Follow me on Instagram

Instagram

3.31.2015

Hexagon Table Runner

So I've been talking about HEXIES in a lot of other posts. Finally, I'll let you onto what I've been doing with them! 

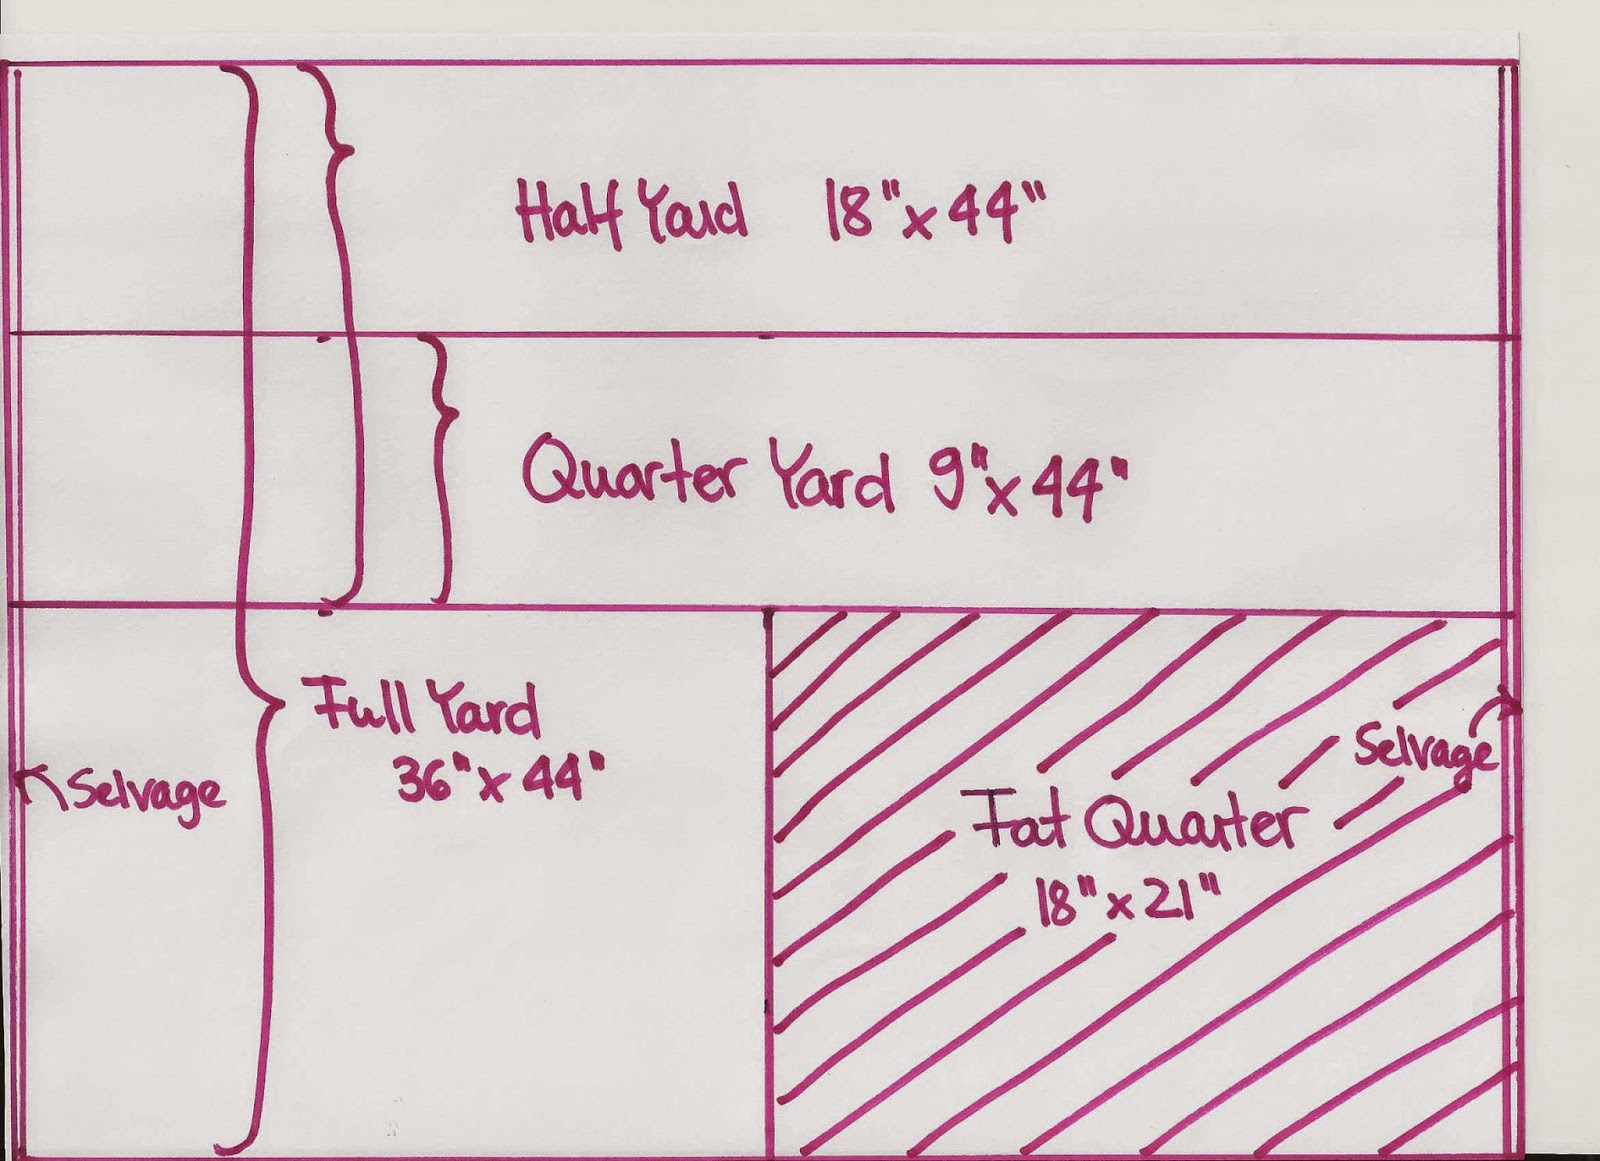
FIRST- What is a hexie? It's a mini-hexagon. I made 1" hexies for my project but you can make them in a bunch of different sizes. 

There are a few hexie-bucket-list-projects I'd like to accomplish. 
  • The quilt to the left has 5" hexies. I'm thinking it'd be lovely in our master bedroom. 
  • The mini-hexi quilt to the right is made up entirely of 1" hexies all sew together by hand. This might be a project I finish when I'm 70! It'll take that long to get all the hexies made! 
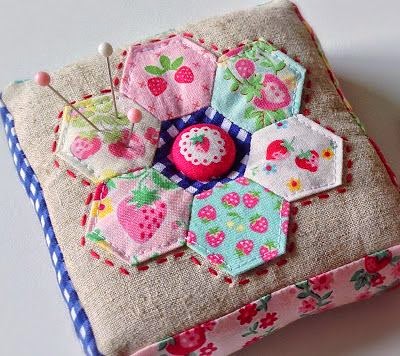
  • The pin cushion is something I'm currently working on for a swap I just joined. I think it'll be pretty fast and I hope to make a few of these. If you're into sewing, let me know and I'll send you a hexie pin cushion :)


My friend Sarah has a great tutorial on how to make them. Here's another too. They are sewn by hand. Once you get the hang of it, making them goes pretty fast. I love the fact that they are done by hand because I can do them on the couch when we are watching TV or in the basement when I'm watching Moses play. 


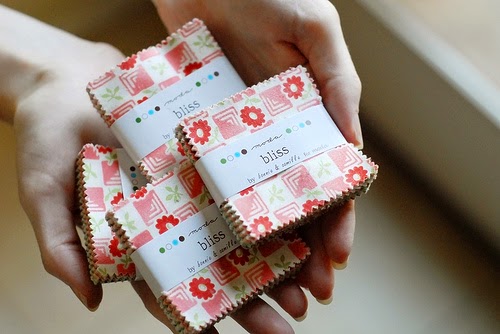
For the 1" hexies you'll want to start with scraps of fabric that are approximately 2 1/2" x 2 1/2". That's why I love the mini-charm packs. They are the exact right size. You can most definitely use your scrapes too. Because I just started sewing I didn't have any scraps when I started so I bought mini charm packs for about $4 each. Etsy sells then as do some more modern quilt shops. 


You'll next need a paper template to fold your fabric around. I initially just googled it and ended up with hexies that were 7/8" and not 1". Not too big of a deal for some projects but for my table runner the layout was a killer because they were not exactly 1". So go to Sew Quickly and use this template as it's exactly 1"- tried and true. 
Here is a finished example of 1" hexie. 


If you want to see the professional photo for my inspiration click HERE. I didn't want to put their photo directly next to mine because theirs is undoubtable better and more professional but I think mine turned out just great! 

So here's my WIP (Work in Progress). The quilting process was surprisingly easy. It was laying out the hexies that took me FOREVER! Remember I said mine were only 7/8" and not a full 1"... it would've been easier with 1"


My finish table runner! I'm so happy with it.


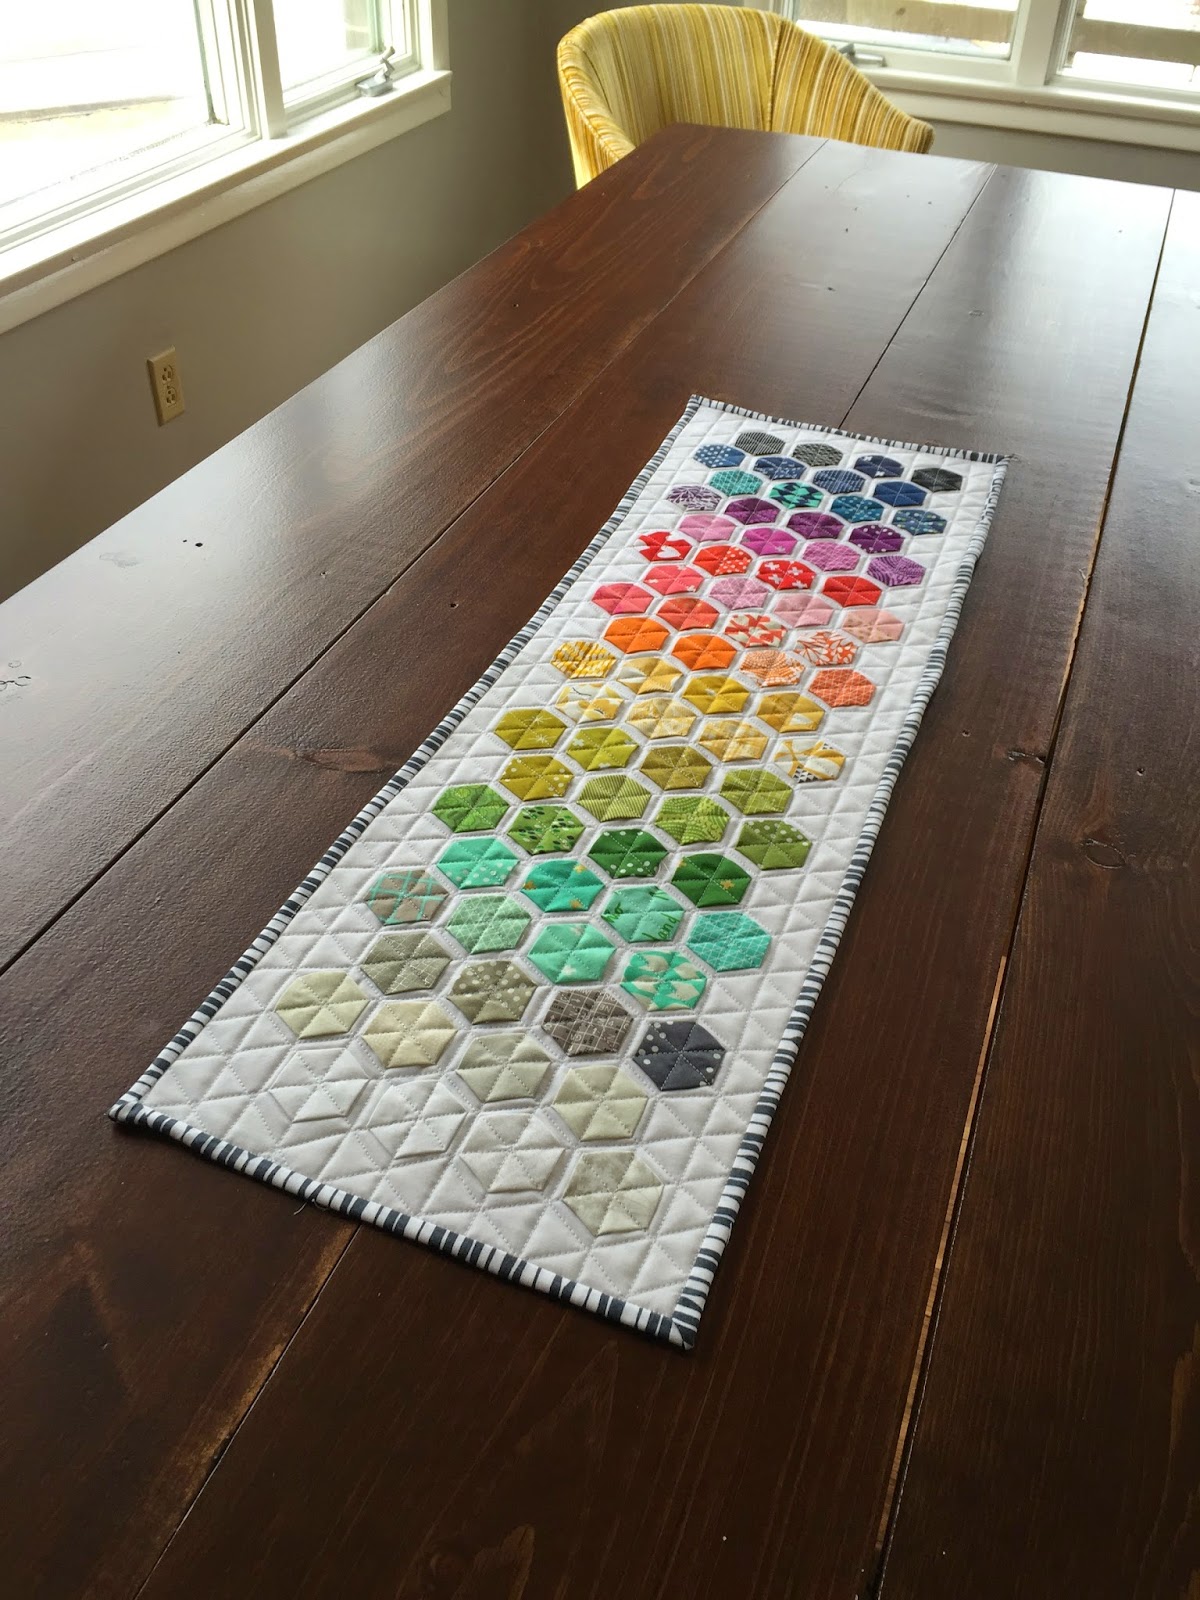
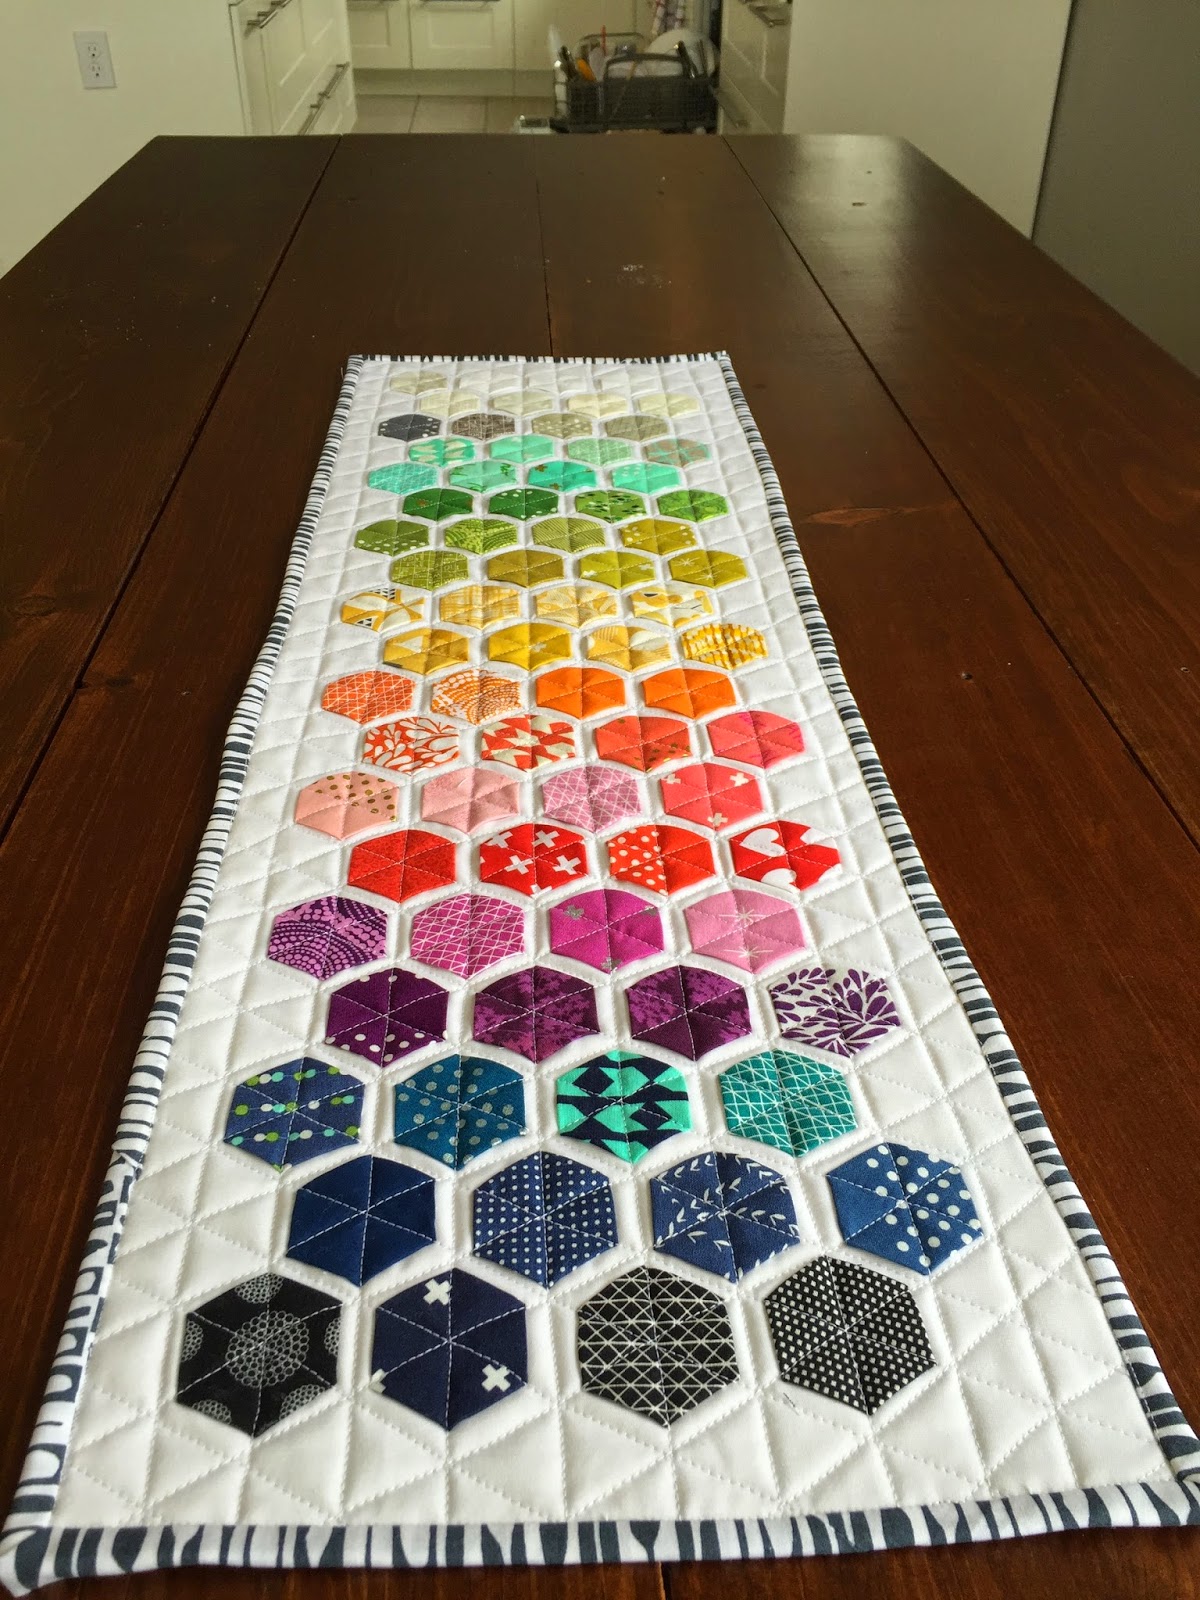
It took almost 70 hexies. It's about 36" long and 12" wide. Most of the fabric was from charm packs- Cotton and Steel fabric line. 


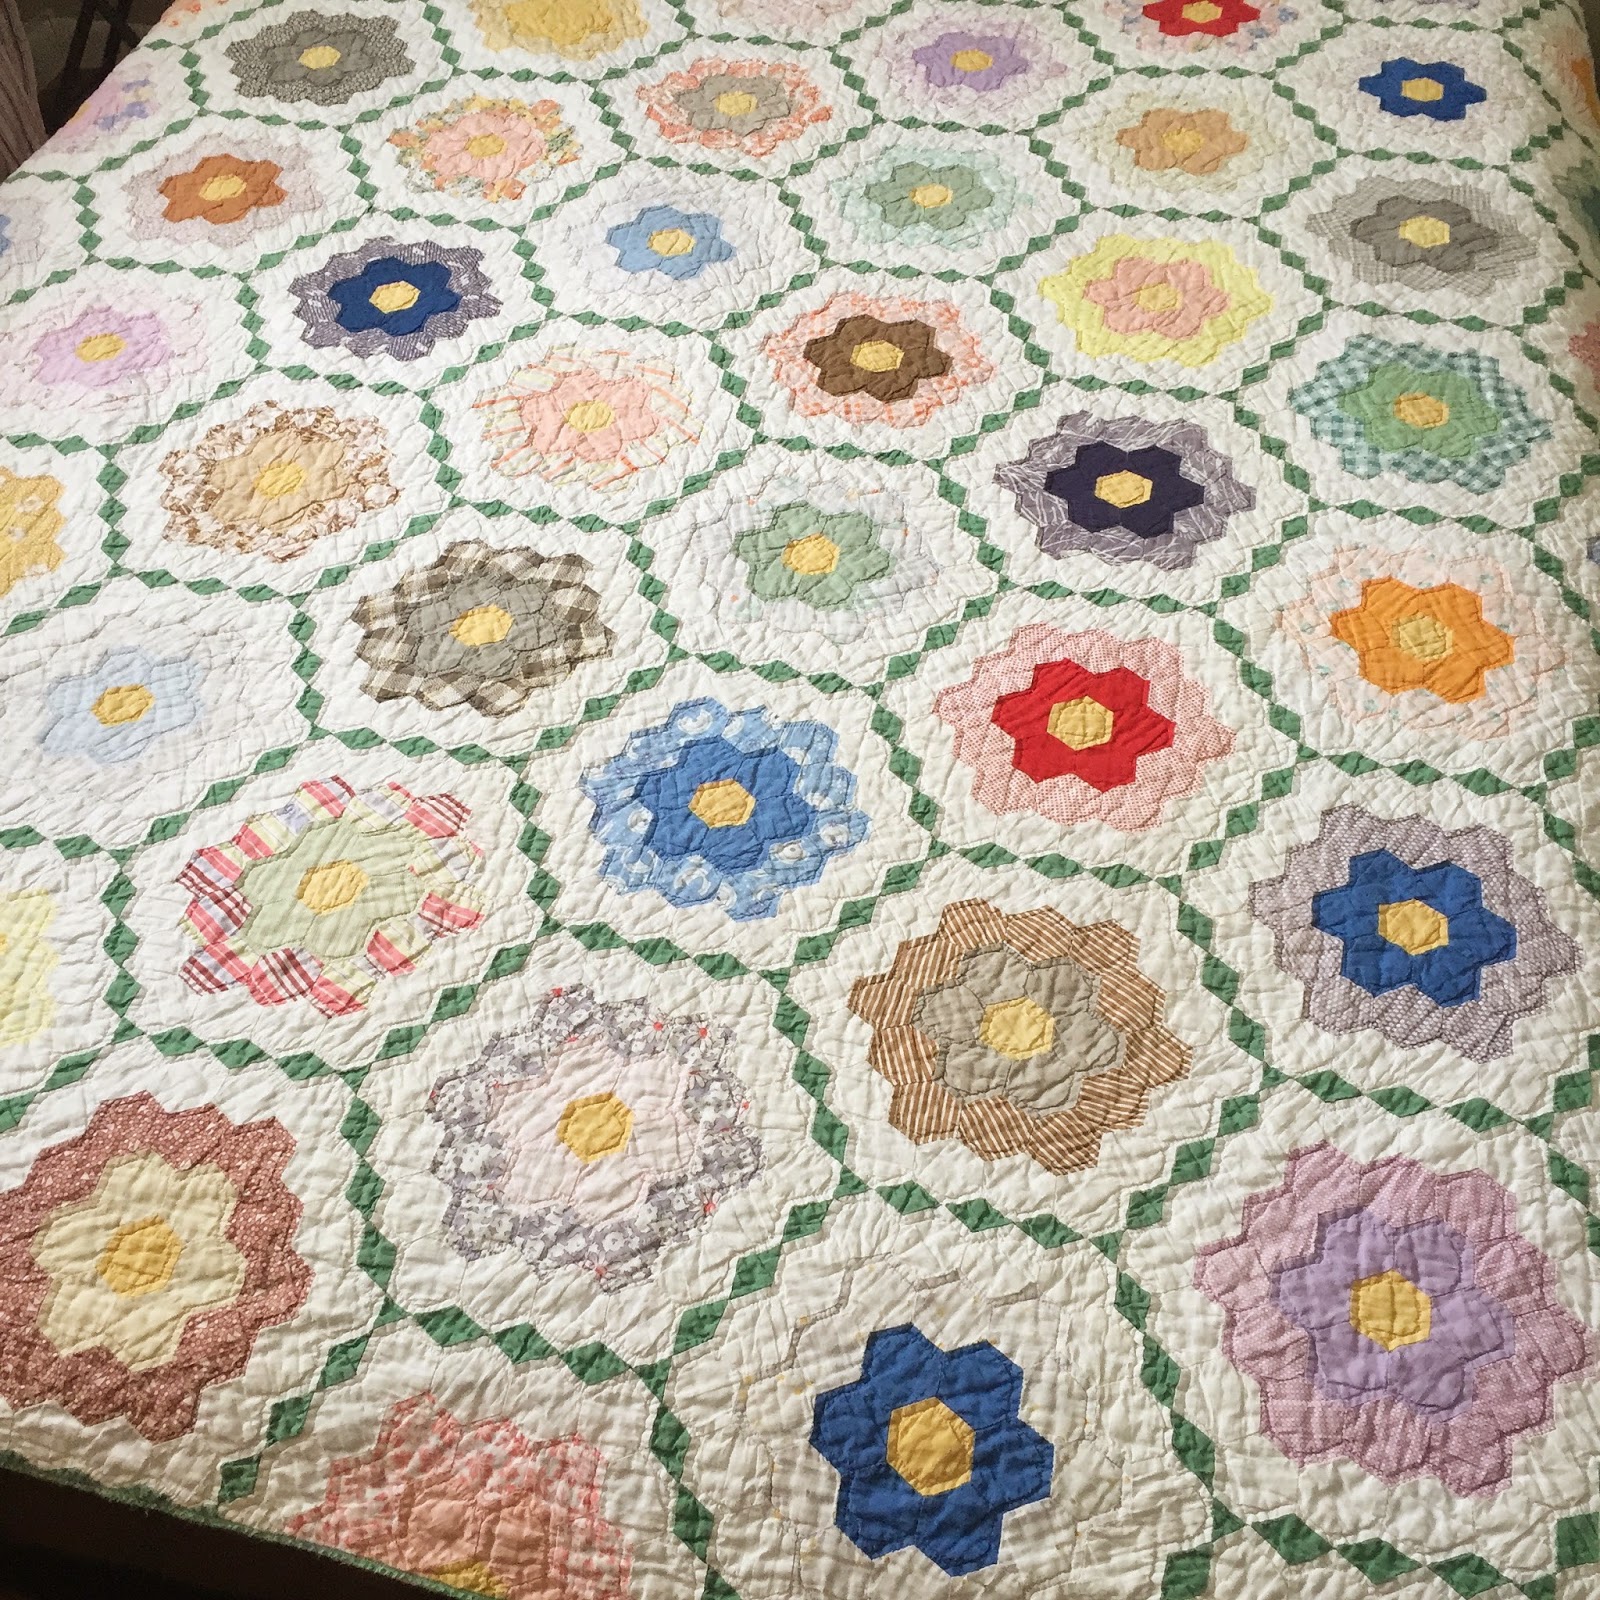
Just so you don't think hexie making is new.... below is a quilt my great-grandma made and is now on my guest bed.  It's called Grandmother's Flower Garden and the pattern has been around for ages. This should be added to my bucket list too. 


Sewing Level: Beginner- except the laying the pieces out - you basically need to be a rocket scientist or use 1" hexies! 
Cost: $12
Time Commitment: 10 hours


3.27.2015

Let's Sew Together!


If you Instagram #sewtogetherbag you will find about a bazillion posts about these cute little bags that you can take with you when you are sewing at a friends house. Again, my desire to have a sew together bag came because of my need to store my new littlehexies (more later). 
These bags are a little tricky for the beginner sewer so I'm glad I had a friend that did a sew along with me on this project. 

We found this great Sew Together Sew Along at The Quilt Barn.  She has a 5 day tutorial with GOBS of pictures. I found it pretty easy to follow along with her. 

FIRST you must purchase the pattern. I found one on Etsy (search: sew together bag) or you can go to the source and order a digital copy Sew Demented. The pattern will cost you $12. 

Gathering your materials is the fun part. I ordered most of my fabric via etsy- thanks to my dad for the gift card for my birthday! I used all fat quarters and piece my pockets together. You could use all one fabric but piecing the fabric makes the bag really unique! 
Understanding the Fat Quarter has been tricky for me for some reason. So here's a picture to help cement it in your head. If you get into quilting FQ's will become your friend! 


I also ordered my zippers from etsy. Zipit Zippers  has a great deal for zippers. You'll need a whopping 4 for this project. Zipit even has a set up order for the sew together bag. Get all 4 zippers for $2.30 +SH. I went with plastic zippers for this project. They are easier to install than metal. 

So here's my WIP (work in progress). 3 of the 4 zippers installed. 


I really didn't run into too much trouble until I had to put on my zipper tabs. It was basically the 2nd to last step to finishing the bag. Quilary  had a tutorial that at least gave me a different view of putting the tabs on. I should have taken some photos of my process. If I make another I'll update this post. 

Here's the final turn out. It's  10" x5" x5". It has 3 zippered pockets and 5 sections. It'll hold a pair of scissors and TONS of other items. There is also an optional pin cushion and needle landing  that you can install. 


Sewing Level: Intermediate, installation of zippers is nice to know but they do a good job of walking you through the process
Cost: $22 + pattern cost ($12)
Time Commitment: 15 hours, It took about 4-5 nights of 3-4 hours each

3.25.2015

Moda Scattered Square Pillow

I got on a kick of buying MINI CHARM PACKS. They are awesome in so many ways. You get to see a large portion of a pattern line and they usually cost under $4. It's a cheap thrill. 


So after buying the mini-charm packs I started to make hexies (more on that later) but I wanted to complete something sooner than the hexies would allow.  I searched Pinterest for "what to do with mini-charm packs". That's when I found this tutorial for the scattered square pillow


My inspiration

I used mostly Vanessa Christensen's Color Me Happy fabric line. The basic white was purchased from JoAnn Fabrics and the backing and binding was picked up at a quilt shop in Indian River. 

The tutorial I used above was very helpful but when I got to the "put the binding on" part. I had to google some more. I found this helpful you-tube video that talked about machine binding.
YouTube: https://www.youtube.com/watch?v=xWh90tXr7g4&index=2&list=WL


Overall I liked machine binding but in a few places I either had to go back and sew over again to catch the back binding or I hand stitched it. I thought it was MUCH faster than hand quilting and it looked pretty good too! 

Materials: 
The pillow took just under 1 charm pack- but I mixed a few packs together. The binding and border were each 1 fat quarter and the back was a 20"x20" piece. You'll also need batting and another layer under the batting to make the pillow top. A full material list is in the tutorial. 

So here's my finished pillow: 

It's holds a pillow that is 20"x 20". It may be a little over stuffed but I like how it makes the stitching of the quilt layer POP. Quilting the top was my favorite part. I love how it adds texture. I also got used to using a walking foot on this pillow. It is a necessity when trying to quilt the top and feeding multiple layers through your machine at one time. It was VERY easy to use. 


The back I wanted to be a solid pattern in case I needed to make my couch a little more neutral. I added the trim piece where the pillow comes together. 

The pattern does have the colored squares off centered and I achieved that! However my white boarders are supposed to all be the same size and straight- I failed at that. The good news though is that I failed all over so it looks like it's supposed to be that way. I attribute this fail to not sewing on a scant 1/4" accurately. Accuracy isn't my strength right now but it will come with time. 


Sewing Level: Beginner just measure accurately and go slowly
Cost: $20
Time: 5 hours

Special materials: Walking foot

3.23.2015

Totes


These totes are an adaption from the Noodlehead Divided Basket. This version which was created by my friend Sarah is a little taller and omits the divided portion of the basket and the exterior pocket. All the same materials were used that noodlehead suggests- such as heavy weight home dec fabric. 


 The totes are perfect for holding my sewing scraps. And you can piece them together to use up fabric too! 


 This black one is for my grandma. She gave me a bunch of fabric when I was just starting to learn about English Paper Piecing (more latter). So, I made her a tote out of the fabric she gave me. I think she will likely use it as a magazine holder- which is about how tall they end up being. 


This was my first attempt at actual sewing- beyond hemming and making curtains. I'd say it was a smashing success. SO far I've made 8 and have plans to make at least two more. They make great gives. For a beginner sewer like myself it took me about 4 hours to put together my first one. When I made 4 at a time the process went a little faster. There is a lot of cutting as there are 4 layers to the basket (exterior, fusible fleece, interfacing, and lining). 

Sewing Level: Beginner
Cost to make: approx. $15 
Time: 4 hours